解析流程:
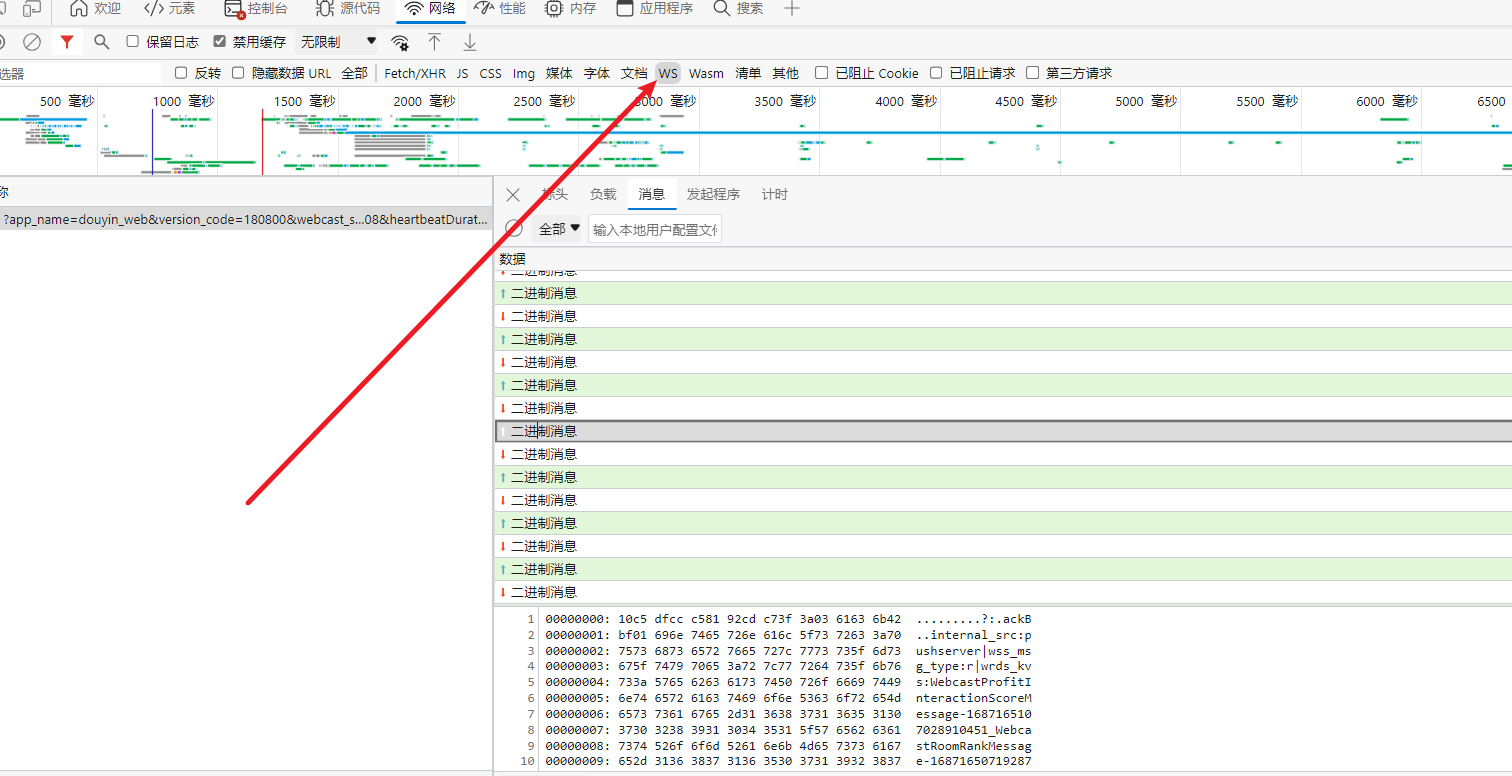
绿色表示客户端消息发给服务器,红色表示服务器下发数据给客户端

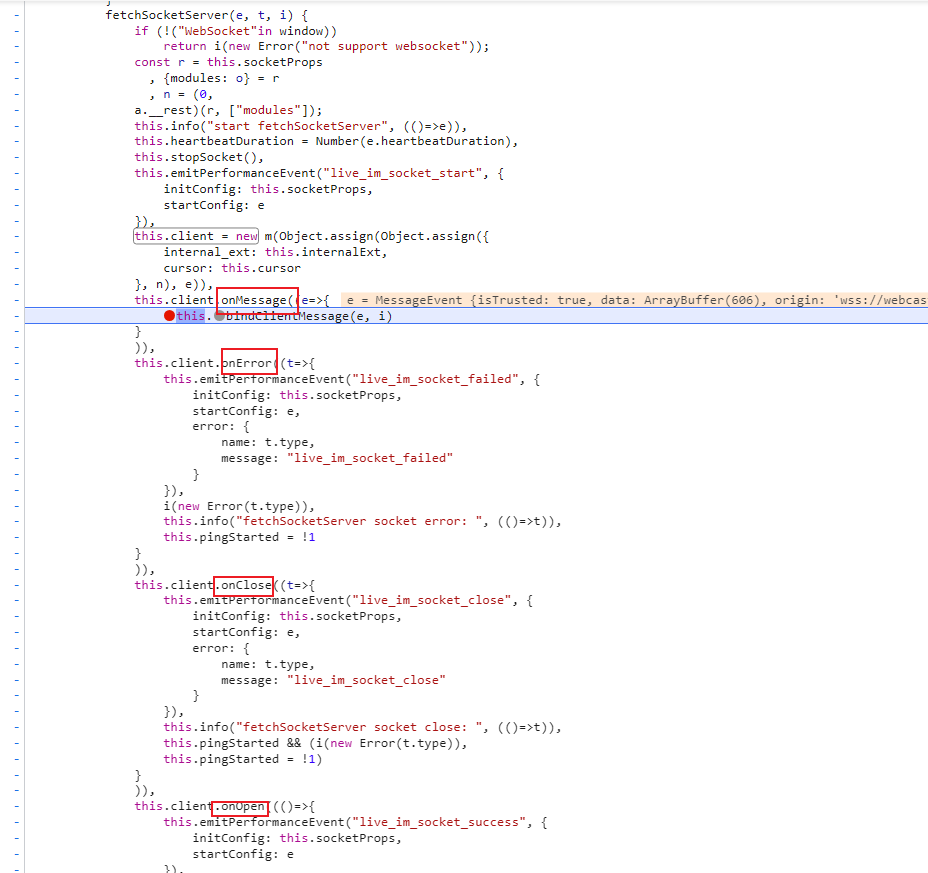
从第一个堆栈开始看起,下面的四个方法,onError(e),onMessage(e),onOpen(e),onClose(e)分别对应着websocket的四个触发事件,分别是 连接错误,接受数据,连接成功,连接关闭
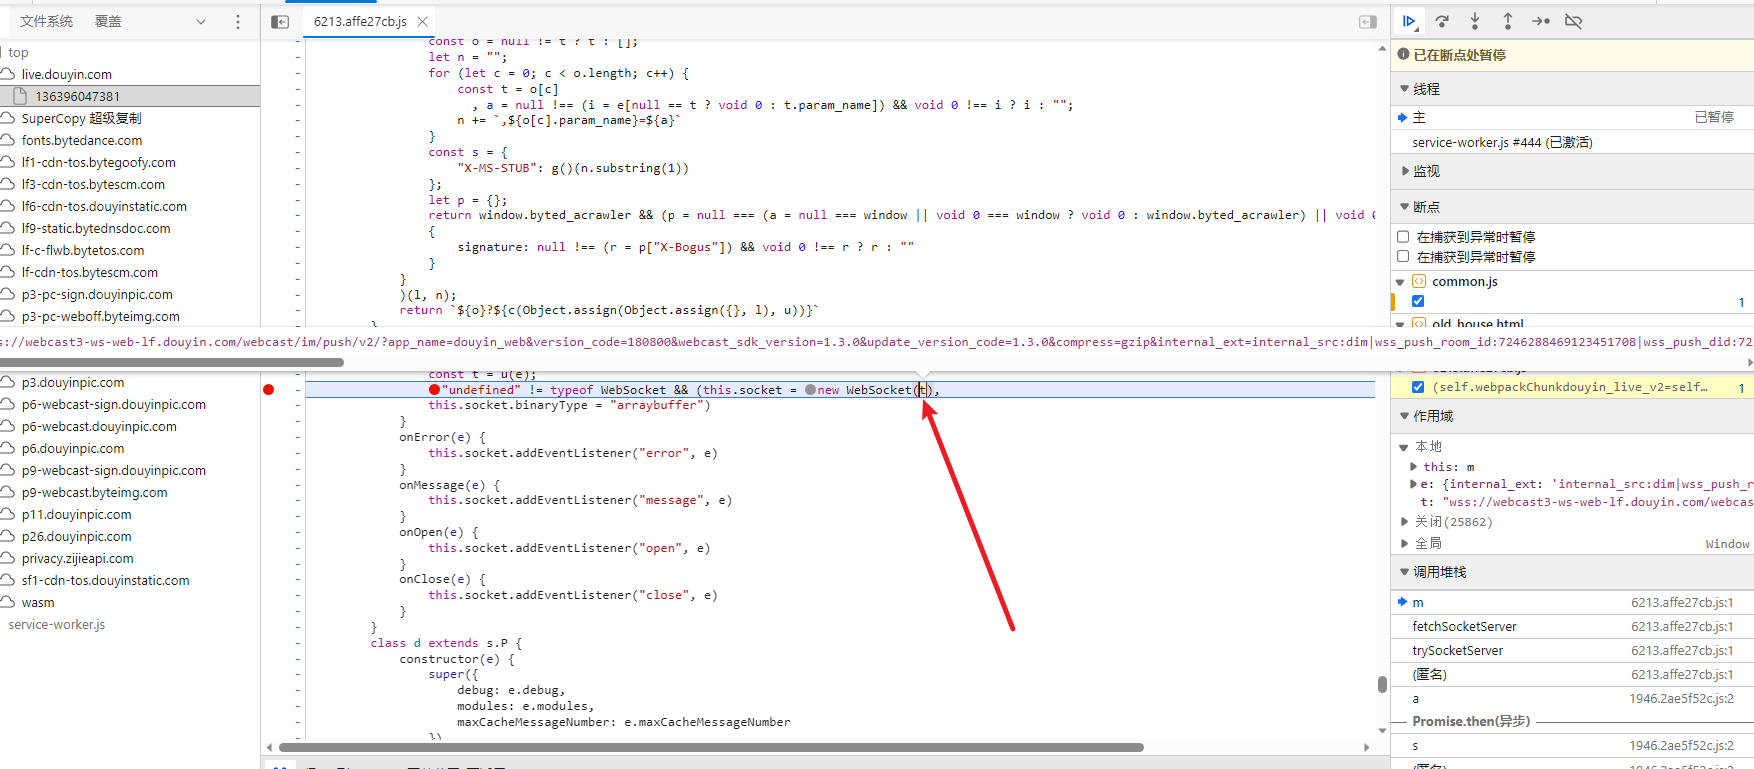
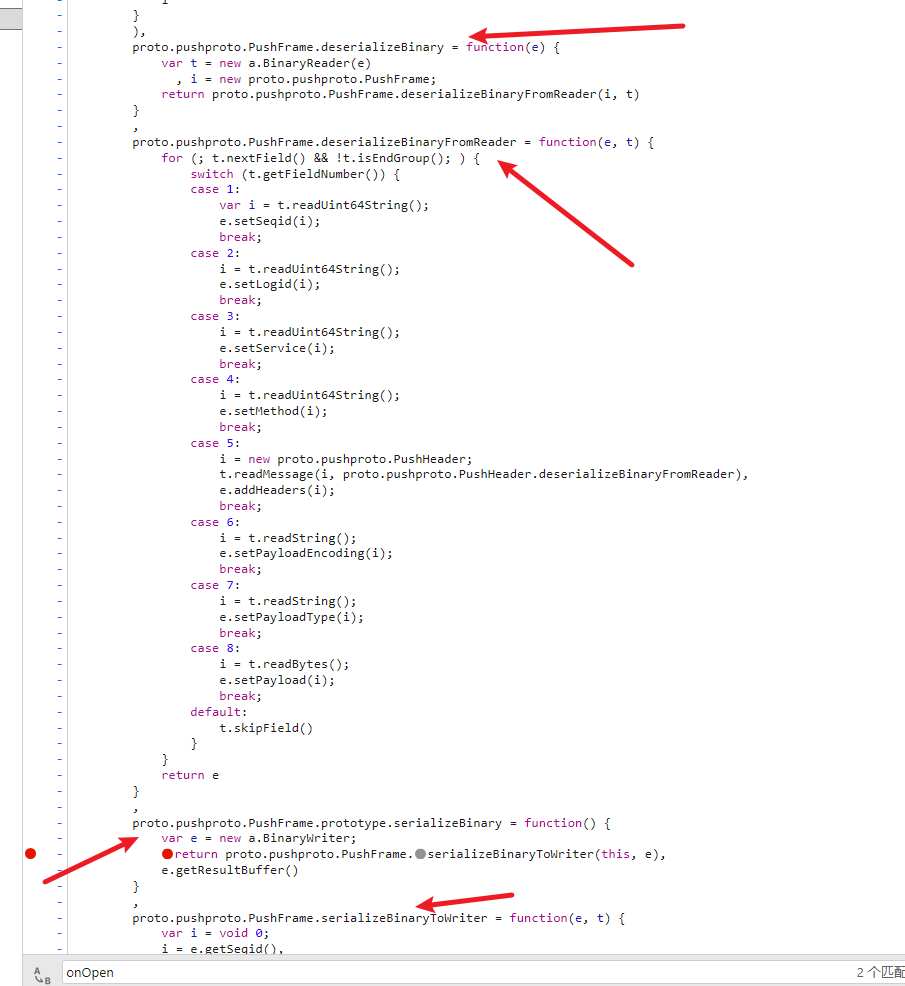
我们直接在 onOpen 打上断点,查看上一个调用堆栈,看一下绑定的方法


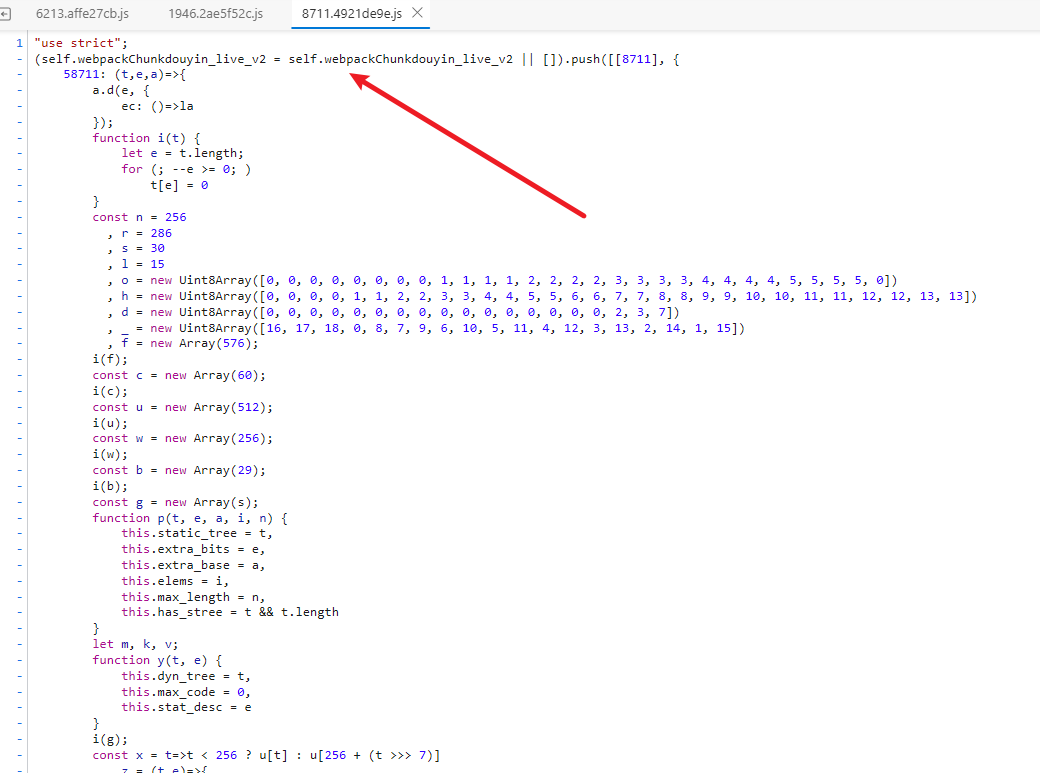
onOpen方法里面都是一些赋值操作,我们直接看 ping方法,我们可以看到关键字 serializeBinary 很明显在这里做了序列化操作 我们看一下 e.serializeBinary() 方法,我们在这一块能看到下面是序列化操作,上面是反序列化操作,后面要跟着写proto文件
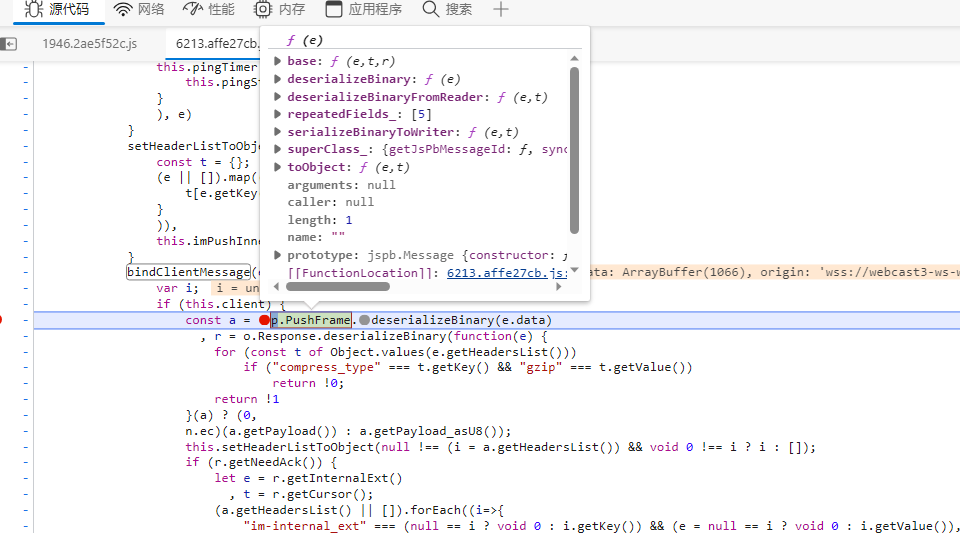
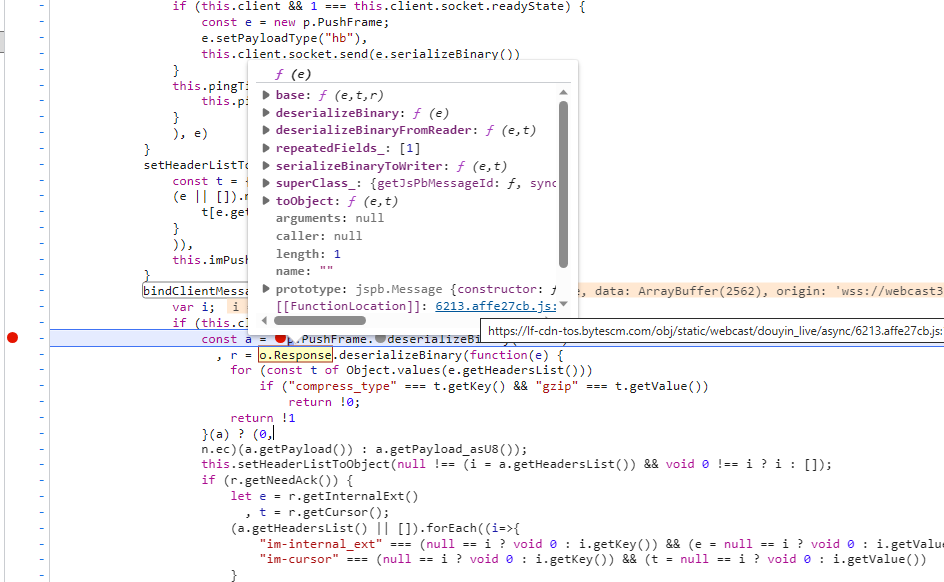
接着我们看一下第二个堆栈fetchSocketServer 这个方法处理数据接收,这里同样绑定四个事件,我们直接看 bindClientMessage 方法
这里就是websocket的消息处理部分了,我们看下代码
1
2
3
4
5
6
7
8
| const a = p.PushFrame.deserializeBinary(e.data)
, r = o.Response.deserializeBinary(function(e) {
for (const t of Object.values(e.getHeadersList()))
f ("compress_type" === t.getKey() && "gzip" === t.getValue())
return !0;
return !1
}(a) ?
(0,n.ec)(a.getPayload()) : a.getPayload_asU8());
|
1
2
3
4
5
6
7
8
9
10
11
12
13
14
15
16
17
18
19
20
21
22
23
24
25
26
27
28
|
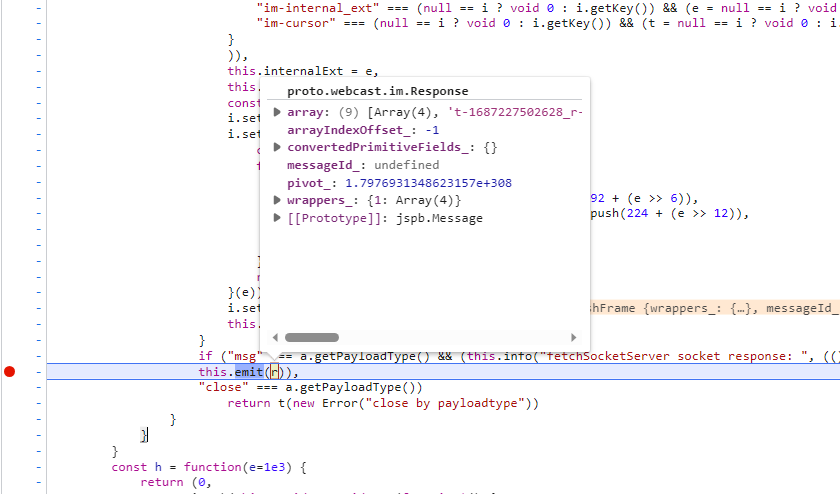
if (r.getNeedAck()) {
let e = r.getInternalExt(), t = r.getCursor();
(a.getHeadersList() || []).forEach((i=>{
"im-internal_ext" === (null == i ? void 0 : i.getKey()) && (e = null == i ? void 0 : i.getValue()),
"im-cursor" === (null == i ? void 0 : i.getKey()) && (t = null == i ? void 0 : i.getValue())
}
)),
this.internalExt = e,
this.cursor = t;
const i = new p.PushFrame;
i.setPayloadType("ack"),
i.setPayload(function(e) {
const t = [];
for (const i of e) {
const e = i.charCodeAt(0);
e < 128 ? t.push(e) : e < 2048 ? (t.push(192 + (e >> 6)),
t.push(128 + (63 & e))) : e < 65536 && (t.push(224 + (e >> 12)),
t.push(128 + (e >> 6 & 63)),
t.push(128 + (63 & e)))
}
return Uint8Array.from(t)
}(e)),
i.setLogid(a.getLogid()),
this.client.socket.send(i.serializeBinary())
}
|
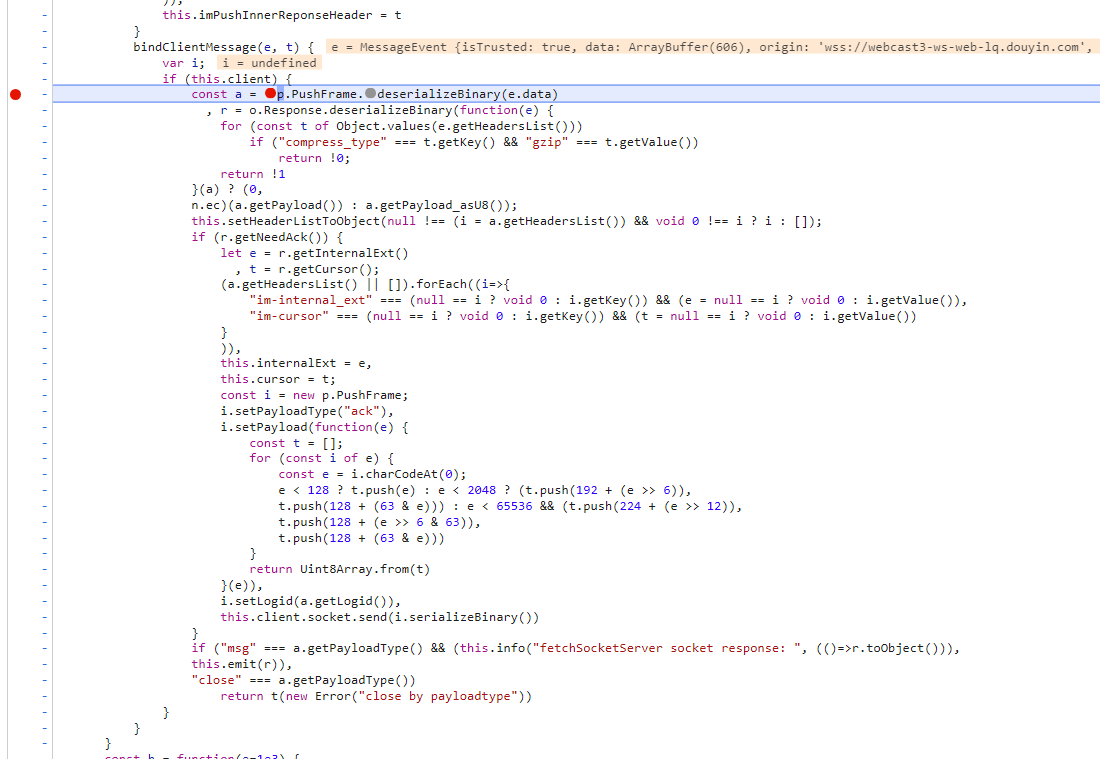
大致的思路就是:n.ec函数处理数据后,然后再来反序列化得到我们要的数据给后面展示,r就是我们要的数据对象,然后如果需要ack就发,最后通过emit函数处理展示值
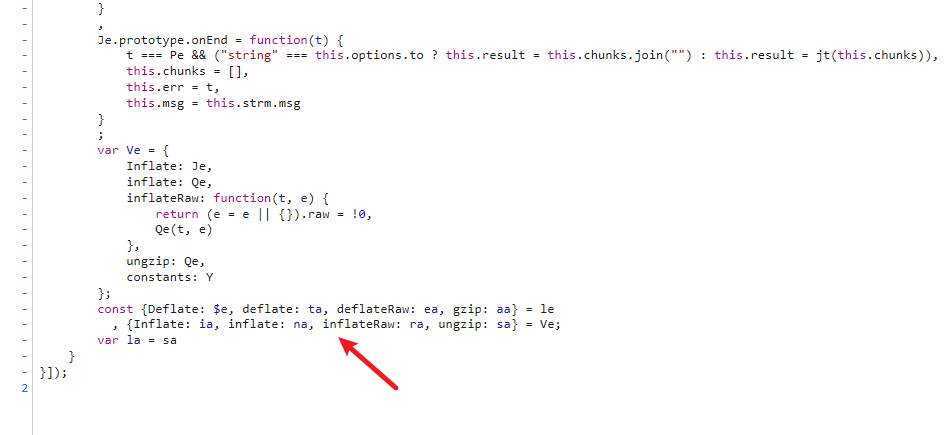
我们看下 n.ec函数,点进去看一下代码,在上面能看到是webpack打包,在下面能看到,这里应该是用来给数据进行压缩获取解压缩
proto文件编写
接下来我们就要考虑编写proto文件了,我们知道 a = p.PushFrame.deserializeBinary(e.data) 是反序列化后的数据,那我们看下proto对象是怎么写的 点击 p.PushFrame
往下拉,我们就能看到 proto对象有哪些字段了,这里需要注意 headersList 字段,headersList 添加了另一个proto对象
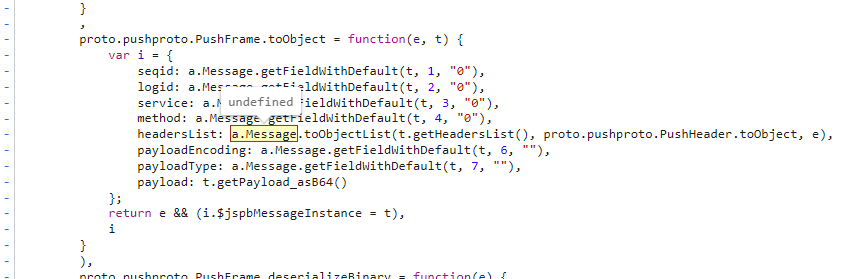
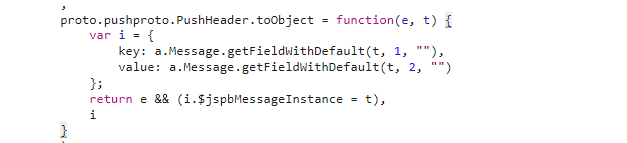
PushFrame 对象的结构我们就知道了,可以这么写
1
2
3
4
5
6
7
8
9
10
11
12
13
14
15
| message HeadersList {
string key = 1;
string value = 2;
}
message PushFrame {
uint64 seqId = 1;
uint64 logId = 2;
uint64 service = 3;
uint64 method = 4;
repeated HeadersList headersList = 5;
string payloadEncoding = 6;
string payloadType = 7;
bytes payload = 8;
}
|
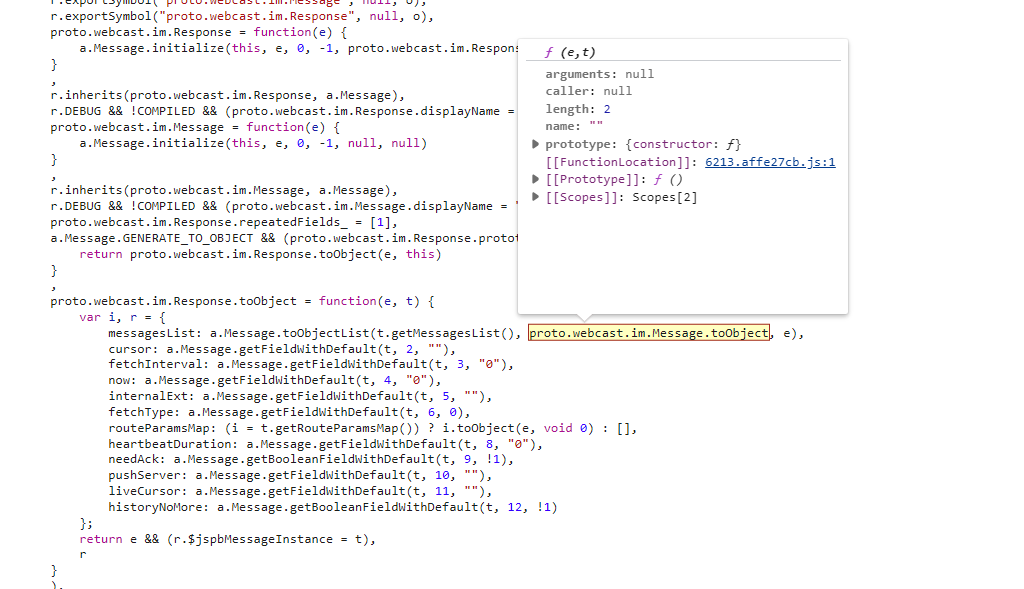
然后我们再看下 o.Response 看下响应的结构
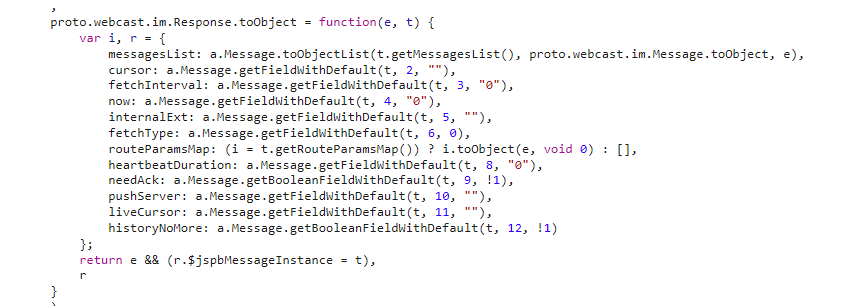
Response 里面有个 messagesList 里面又有个 message对象, 这里也需要补全
1
2
3
4
5
6
7
8
9
10
11
12
13
14
15
16
17
18
19
20
21
22
23
24
25
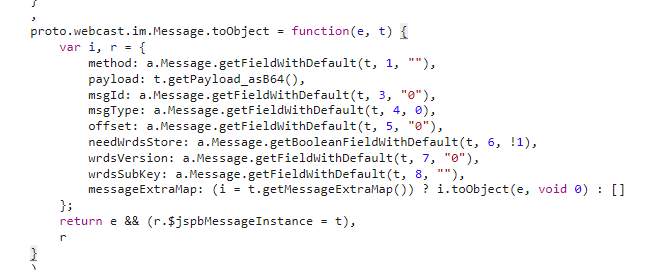
| message Message {
string method = 1;
bytes payload = 2;
int64 msgId = 3;
int32 msgType = 4;
int64 offset = 5;
bool needWrdsStore = 6;
int64 wrdsVersion = 7;
string wrdsSubKey = 8;
}
message Response {
repeated Message messagesList = 1;
string cursor = 2;
uint64 fetchInterval = 3;
uint64 now = 4;
string internalExt = 5;
uint32 fetchType = 6;
map<string, string> routeParams = 7;
uint64 heartbeatDuration = 8;
bool needAck = 9;
string pushServer = 10;
string liveCursor = 11;
bool historyNoMore = 12;
}
|
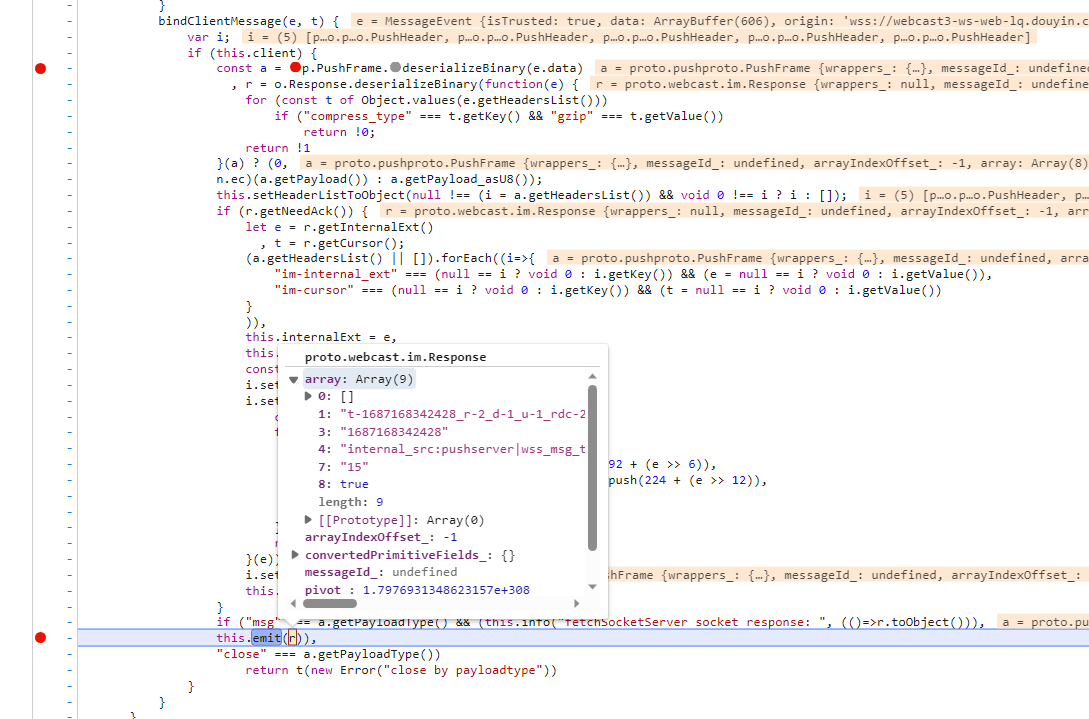
至此,最基本的两个proto对象我们已经写好了,回到源代码里面来,我们知道最后的展示数据是交给了 this.emit(r)) 进行处理,我们看下 this.emit()方法
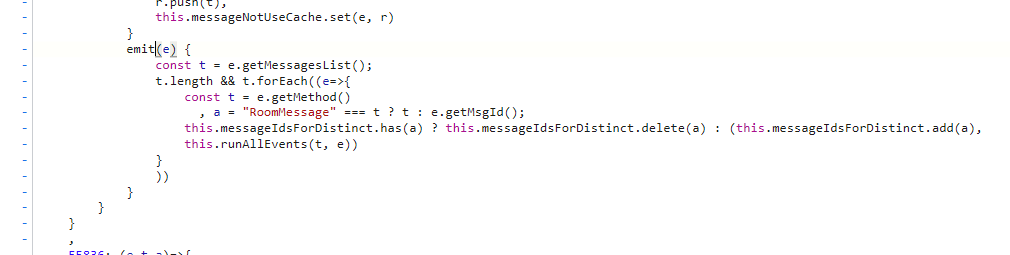
我们能看到代码里面有个 forEach循环,这里的意思是 它一次性并不是只接收一条数据,最多的时候好像可以接收五条数据,所以这里需要有个for循环来逐一处理,处理的方法是 this.runAllEvents(t, e),点进来,我们看一下
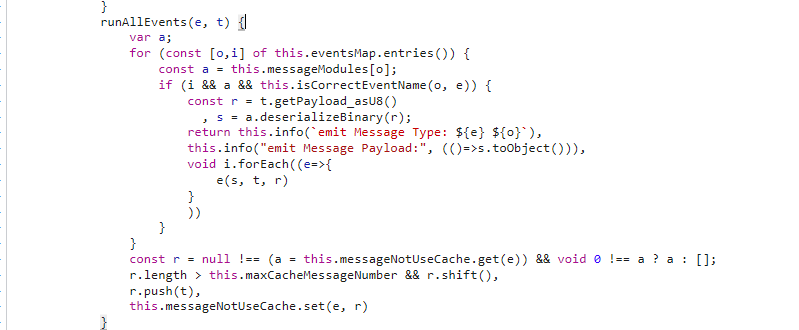
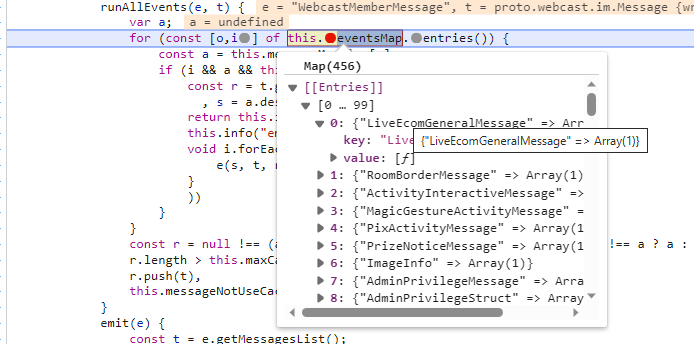
这里就是处理数据类型,通过查看 this.eventsMap 我们可以看到,抖音分了456种数据类型,而此时进来的数据类型是 "WebcastMemberMessage"表示是有新的观众进来, 我们把断点打在下面,多运行几次,我们能看到有很多种不同类型的数据进来。
我们只拿弹幕,如果要采集其它数据类型,比如礼物啥的,可以看下 gift 字眼的数据类型
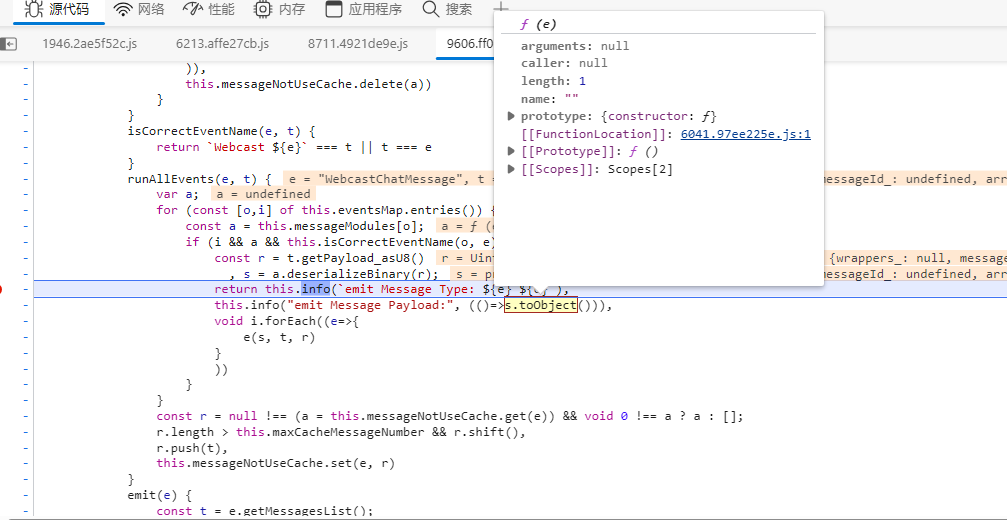
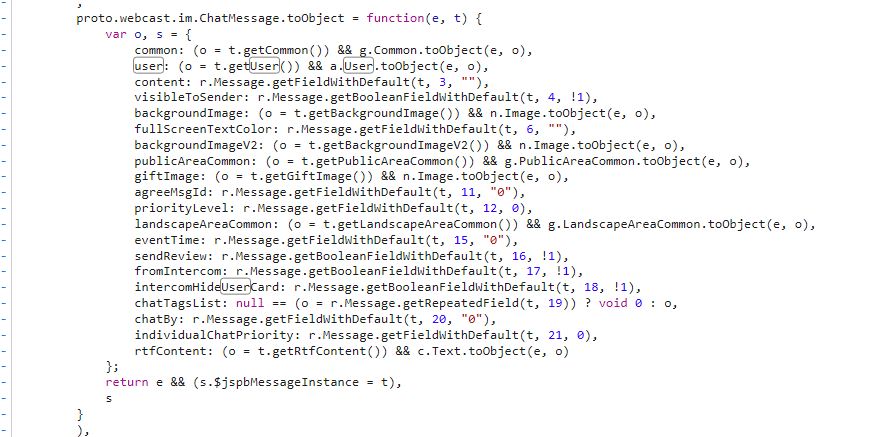
"WebcastChatMessage" 就代表是有观众在发送弹幕,这也就是我们要的数据,这个时候我们可以看一下 s.toObject 就是 WebcastChatMessage 的proto对象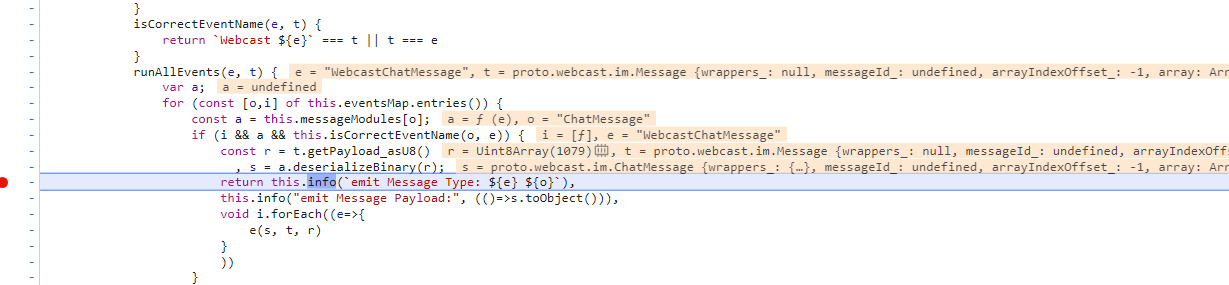
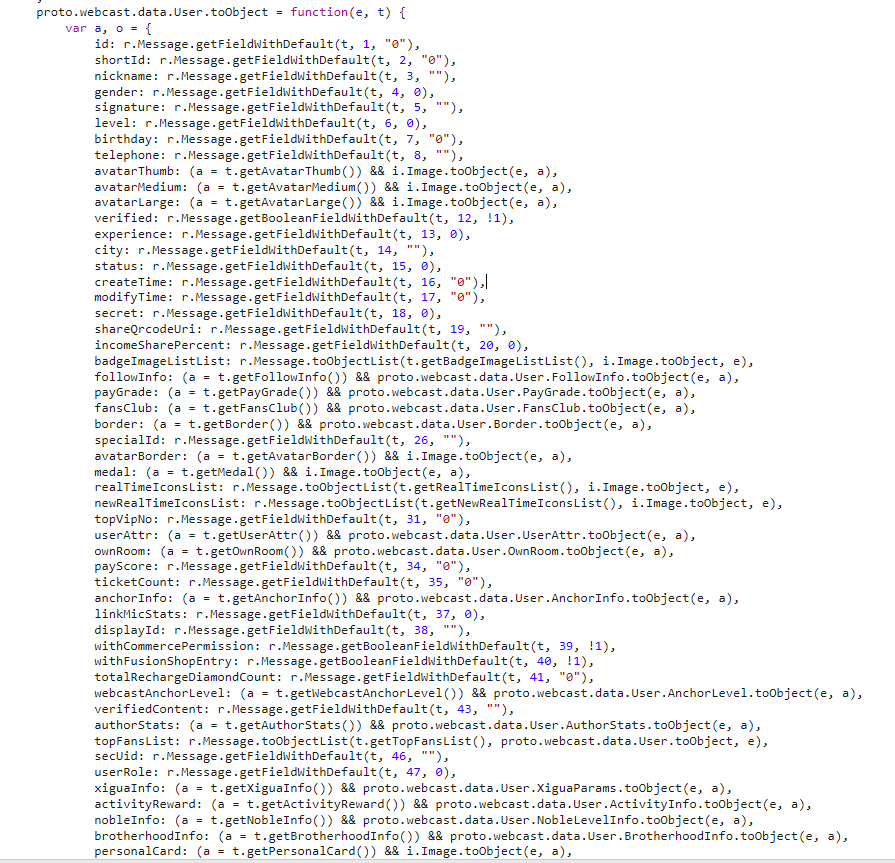
进来可以发现字段比较多,但是我们可以精简一下,只要一个 user 和 content就好了,其他的都不重要,而user对象又是另一个proto对象,且user对象也巨长无比,我们也可以精简一下
最终的proto文件就是这样,然后转换成py文件
1
2
3
4
5
6
7
8
9
10
11
12
13
14
15
16
17
18
19
20
21
22
23
24
25
26
27
28
29
30
31
32
33
34
35
36
37
38
39
40
41
42
43
44
45
46
47
48
49
50
51
52
53
54
55
56
57
58
59
60
61
62
63
64
65
66
| syntax = "proto3";
package douyin;
message HeadersList {
    string key = 1;
    string value = 2;
}

message PushFrame {
    uint64 seqId = 1;
    uint64 logId = 2;
    uint64 service = 3;
    uint64 method = 4;
    repeated HeadersList headersList = 5;
    string payloadEncoding = 6;
    string payloadType = 7;
    bytes payload = 8;
}
message Message {
string method = 1;
bytes payload = 2;
int64 msgId = 3;
int32 msgType = 4;
int64 offset = 5;
bool needWrdsStore = 6;
int64 wrdsVersion = 7;
string wrdsSubKey = 8;
}
message Response {
repeated Message messagesList = 1;
string cursor = 2;
uint64 fetchInterval = 3;
uint64 now = 4;
string internalExt = 5;
uint32 fetchType = 6;
map<string, string> routeParams = 7;
uint64 heartbeatDuration = 8;
bool needAck = 9;
string pushServer = 10;
string liveCursor = 11;
bool historyNoMore = 12;
}
message ChatMessage {
User user = 2;
string content = 3;
bool visibleToSender = 4;
}
message User {
uint64 id = 1;
uint64 shortId = 2;
string nickName = 3;
uint32 gender = 4;
string Signature = 5;
uint32 Level = 6;
uint64 Birthday = 7;
string Telephone = 8;
string city = 14;
}
|
代码与展示
转换完成后,我们就可以开始编写py代码了,建立连接后,最重要的是pb2文件的使用,以及注意我们上面讲的数据解压和发送ack包,最后再根据数据类型的不同进行数据处理
1
2
3
4
5
6
7
8
9
10
11
12
13
14
15
16
17
18
19
20
21
22
23
24
25
26
27
| def on_message(ws, content):
frame = PushFrame()
frame.ParseFromString(content)
origin_bytes = gzip.decompress(frame.payload)
response = Response()
response.ParseFromString(origin_bytes)
if response.needAck:
s = PushFrame()
s.payloadType = "ack"
s.payload = response.internalExt.encode('utf-8')
s.logId = frame.logId
ws.send(s.SerializeToString())
for item in response.messagesList:
if item.method != "WebcastChatMessage":
continue
message = ChatMessage()
message.ParseFromString(item.payload)
if message.content == "":
continue
if message.user.gender == None:
message.user.gender = 0
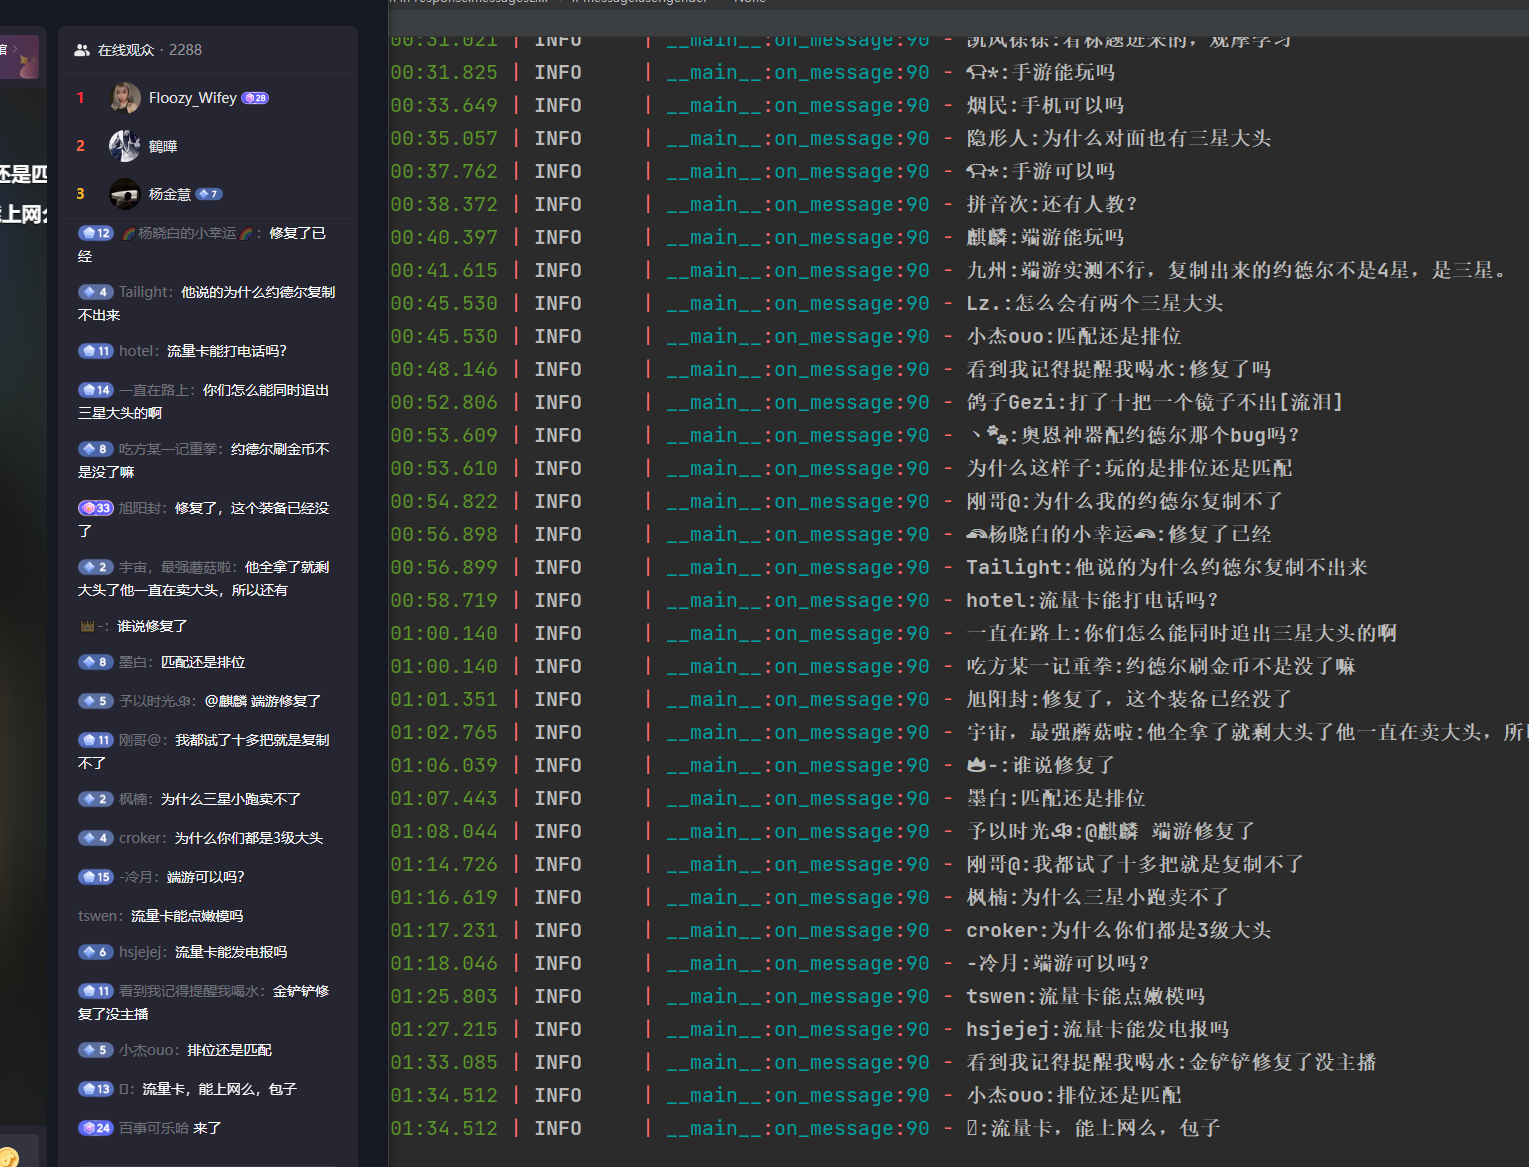
logger.info(f"{message.user.nickName}:{message.content}")
|
最终效果展示: